
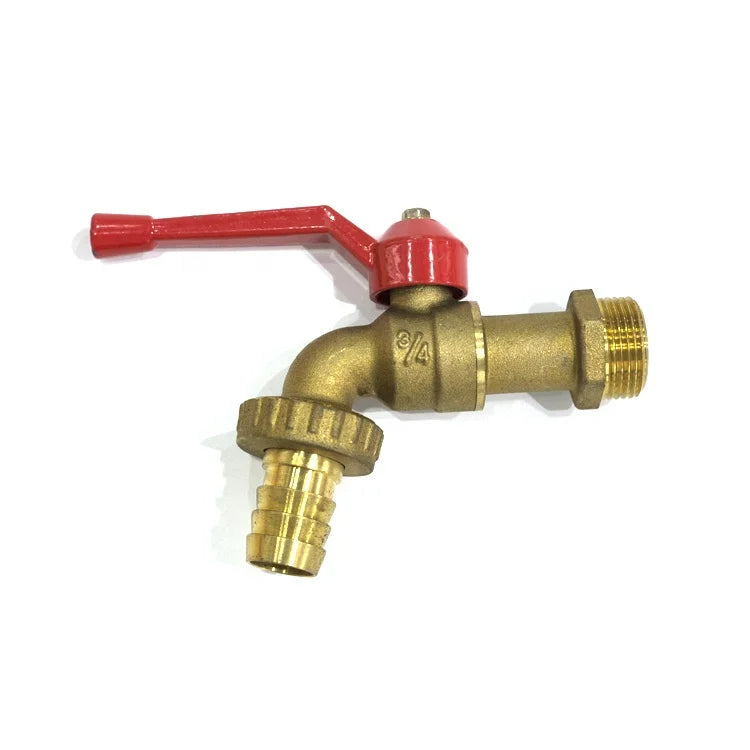
To replace an outdoor tap, turn off the water upstream, drain the pipe, then unscrew the old tap while holding the wall connector steady with a second spanner. Before buying the new one, measure the thread of the water outlet: 1/2 or 3/4. The height is a matter of how you use it: high enough to slide your tallest watering can under the spout.
All our wall-mounted, garden and frost-proof models are in our outdoor tap collection. This guide ties together the three questions that come up when replacing one: the connector, the height, the fitting.
The connector: 1/2 or 3/4, to check before anything else
An outdoor tap screws onto a threaded outlet. Two sizes come up: 1/2, which our product pages describe as the standard thread for French water supplies, and the larger 3/4. Among the outdoor taps in our catalogue that give this detail, eight are 1/2 and one is 3/4; for the others, the product page does not say.
How do you tell? Unscrew the old tap and compare the thread on the wall with a known fitting, or measure its outer diameter and compare it with the chart at a plumbing merchant. If in doubt, take the old tap with you: it is the safest way. The page for the 3/4 garden tap (€29.90) says it plainly: this is the measurement to check on your water supply before ordering.
Outdoor tap height: a question of use
We know of no rule that sets a height for a garden tap. It is decided by what you put underneath:
- watering can or bucket: measure the tallest one you use, and place the spout above it, leaving room for your hand to tilt it;
- hose only: height matters less, mainly allow room under the spout for the hose end and the quick-release connector;
- outdoor washing machine: the height of the machine's inlet decides;
- winter: whatever the height, an outdoor tap must be drained before the frost, or you choose a frost-proof one.
Changing the height of an existing tap means reworking the pipe in the wall: that is no longer a replacement, it is moving the water outlet.
Replacing an outdoor tap, step by step
1. Turn off the water and drain the pipe
Close the valve that feeds the outdoor tap, often inside near the wall, otherwise the main stopcock. Open the outdoor tap to drain the water left in the pipe.
2. Unscrew the old tap without twisting the pipe
Use two tools: a spanner or pliers to hold the fixed connector coming out of the wall, the other to turn the tap. Without this second grip, it is the pipe in the wall that turns, and the repair becomes a building job.
3. Prepare the thread
Clean the thread on the wall. Wind PTFE tape, or hemp with its paste, around the male thread, in the direction of tightening, so that it does not come undone as you tighten. Remember to slide on the cover plate before screwing in, if your model has one.
4. Screw in the new tap
Screw by hand, then tighten moderately with a spanner, always holding the wall connector. Stop when the spout points downwards. Avoid backing off to correct the angle: loosening damages the seal on the thread, so it is better to redo the tape.
5. Turn the water back on and check
Reopen the water slowly, open and close the tap several times, and watch the connector: it should stay dry. A drip at the thread is fixed with a quarter turn, no more.
Which outdoor tap to choose as a replacement
Classic wall-mounted
The most common case: a wall-mounted outdoor tap that comes out of the wall, spout pointing down. Brass models are grouped in the brass outdoor tap collection.
Frost-proof
On a frost-proof outdoor tap, the valve closes upstream of the wall, out of reach of the frost. The brass frost-proof outdoor tap (€29.90) has a 1/2 connector and wall mounting. For a standard tap, winter protection is covered in our article how to stop an outdoor tap freezing.
Double outlet for the garden
To connect a hose and a machine, or two hoses, a double-outlet garden tap saves adding a T-piece. The black double-outlet garden tap (€39.90) has two independent quarter-turn lever outlets, and its product page lists the hose connector and PTFE tape as supplied.
What if you keep an indoor tap outside?
An indoor tap is not designed for frost, rain and sun. The full answer, material by material, is in our article can any tap be used outdoors.
The questions we get asked most
How do you change a tap without turning off the water?
Don't do it on an outdoor tap: under pressure, water gushes out at full flow as soon as the tap is unscrewed. If there is no dedicated valve, turn off the main stopcock for the duration of the replacement.
How do you drain an outdoor tap?
Close the internal valve that feeds it, then open the outdoor tap and leave it open: the water left in the exposed section runs out and does not freeze inside the body.
What is the standard size of an outdoor tap?
The two common sizes are 1/2 and 3/4. 1/2 is the most common in our catalogue, but only measuring your water outlet settles it.
My outdoor tap is leaking: does it need replacing?
Not always: a worn washer can be replaced, a body split by frost cannot. The causes of leaks, spot by spot, are covered in our article on the leaking or dripping tap.
