
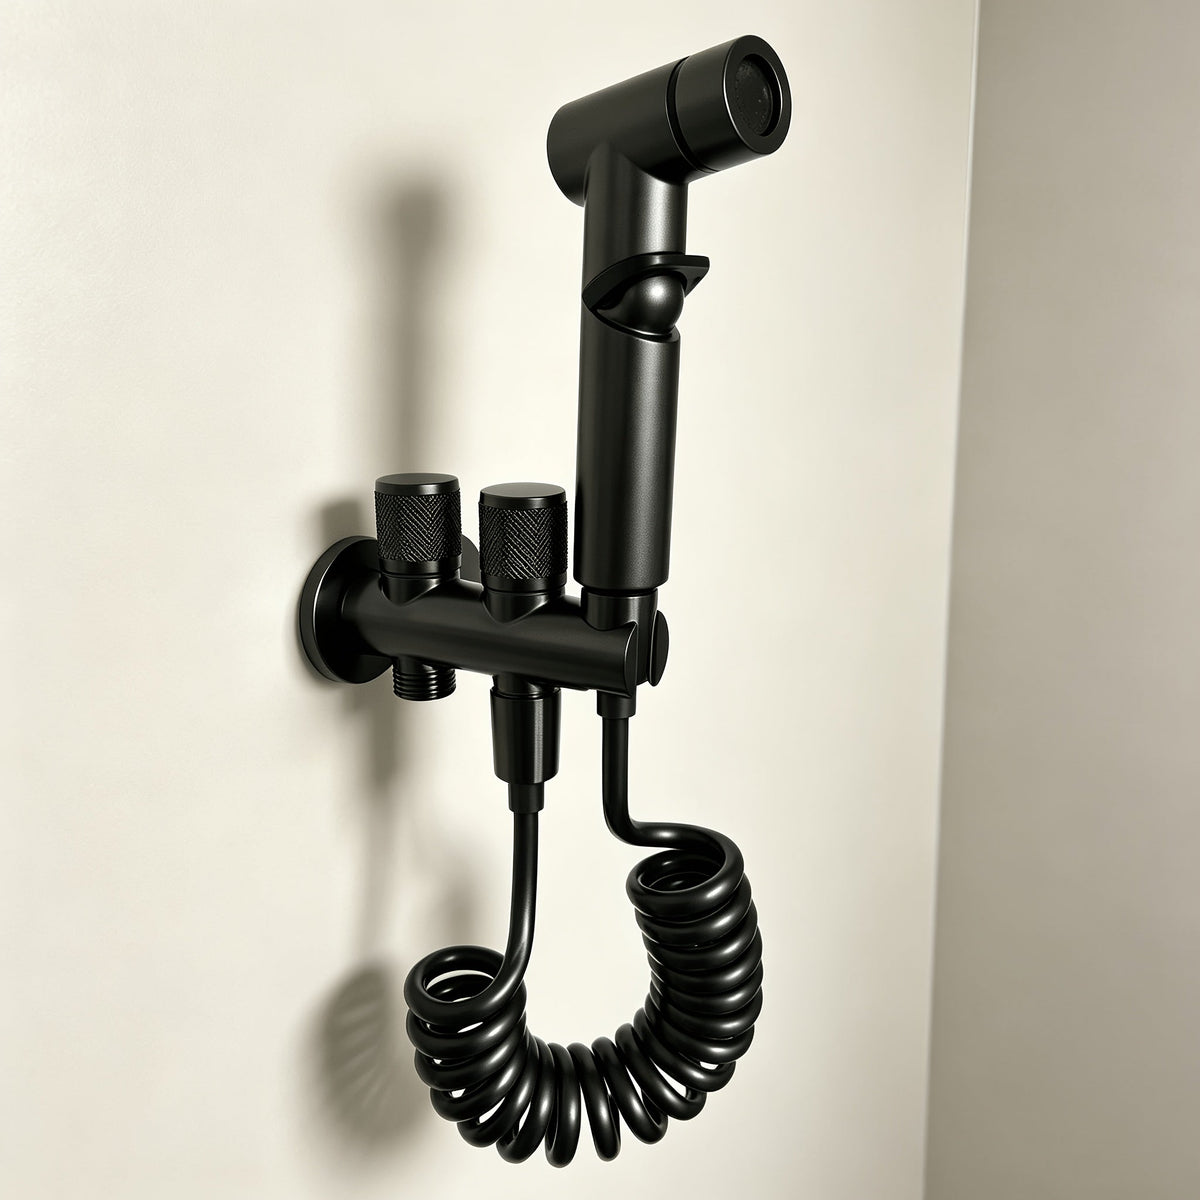
To fit a toilet bidet sprayer, you turn off the water, screw a 3-way tap (or a tee adapter) onto the cistern's water supply, then connect the cistern on one side and the sprayer hose on the other. All that is left is to fix the holder to the wall, reopen the water slowly and check that no fitting weeps.
The connection is made on the existing plumbing, with no new water supply, using a spanner and PTFE tape. First choose your toilet bidet sprayer, then check whether a 3-way toilet tap is supplied in the kit or has to be added: that is the part that decides the set-up.
What you need before you start
A toilet bidet sprayer is made up of four elements: the sprayer itself, its hose, a wall holder to store it, and the part that draws water from the cistern supply. The latter is either a 3-way tap, which replaces your current isolation valve, or a tee adapter, which screws onto its outlet.
To compare these parts, our toilet taps and bidet sprayers bring together complete kits, 3-way taps and tee adapters.
Depending on the kit, not everything is in the box. A few examples from our product pages:
- the toilet bidet sprayer kit (€29.90) includes the tee adapter and the wall holder;
- the toilet tap with bidet sprayer (€24.90) includes the sprayer, the hose and the wall holder, but no 3-way tap: you need to get that separately;
- the bidet sprayer with two-way tee (€62.90) has a 1/2″ connection and comes with two connecting hoses and its handle;
- the bidet sprayer with 3-way tap and spiral hose (from €79.90 to €85.90 depending on the finish) combines the sprayer and its 3-way tap.
As for tools, you will need an open-ended spanner or water pump pliers, PTFE tape, a cloth, a bowl for the water left in the pipes, and a drill if your holder screws to the wall.
Check the thread of your water supply
On a toilet, the isolation valves and their hoses are most often 12/17 (3/8″) or 15/21 (1/2″). Look at the thread on your current valve before ordering: a 3-way tap must be the same size to screw into its place.
The chrome 3-way toilet tap (€14.90) and the brass 1/2 3-way toilet tap (€19.90) are 1/2″. The gold 3-way toilet tap (€24.90) can be chosen in 1/2″ or 7/8″. If you are unsure about the washers, our guide on which washer for a toilet tap details the diameters and types of washers.
Fitting the toilet bidet sprayer, step by step
- Turn off the water. Close the toilet's isolation valve or, if it no longer closes, the mains supply. Flush to empty the cistern and put the bowl under the tap.
- Disconnect the cistern hose. Unscrew the nut that links the isolation valve to the cistern hose. A little water runs out, which is normal.
- Fit the 3-way tap or the tee. With a 3-way tap, unscrew the old isolation valve and screw the new one in its place, after winding PTFE tape around the male thread. With a tee adapter, screw it directly onto the outlet of the existing isolation valve. Replacing the tap is detailed in our guide on how to change a toilet tap.
- Reconnect the cistern. Screw the cistern hose back onto one of the two outlets, with the washer properly in place.
- Connect the sprayer. Screw the sprayer hose onto the other outlet. Tighten by hand, then moderately with the spanner, without forcing.
- Fix the holder. Drill and plug if your holder screws on, or stick it to a smooth, dry surface if it is adhesive.
- Reopen the water slowly. Open slowly, let the cistern fill, then operate the sprayer. Run a dry piece of paper over each fitting: it should stay dry.
What height and where to put the sprayer holder
The right height is that of your hand when seated: the holder goes within reach, on the side of the hand that will hold the sprayer, most often on the side wall or next to the cistern. Before drilling, hold the sprayer where you plan to put it and check that the hose reaches the holder without being stretched or kinked: a twisting hose kinks and ends up leaking at the fitting.
If you do not want to drill the tiles, the bidet sprayer with no-drill holder and telescopic hose (€59.90) goes up without a drill.
The wall-hung toilet case
On a wall-hung toilet, the isolation valve is not visible: it sits behind the flush plate, inside the frame. You remove the plate, which clips or screws off depending on the model, then the cover panel to reach the valve. The installation is then done in the same way as on a floor-standing toilet.
If the valve cannot be reached without opening the partition, it is better to have a plumber look at the job. The wall-hung toilet bidet sprayer (€79.90) comes with its tee adapter and wall holder.
Mistakes to avoid
- Overtightening. A crushed washer loses its seal. Tighten moderately, and only tighten slightly more if a fitting weeps.
- Forgetting a washer. Each hose nut has its flat washer. Check that it is in place before screwing back on.
- Getting the size wrong. A 1/2″ 3-way tap does not screw onto a 3/8″ supply. Check the thread before buying.
- Expecting warm water from the cistern supply. This supply only gives cold water. Models with a mixer come with two hoses, hot and cold: they need a hot water supply nearby.
- Leaving the hose under pressure. A trigger sprayer stops when you release it, but the hose stays pressurised. Closing the sprayer control after use, when your 3-way tap or tee has one, relieves the hose.
The questions we get asked most
How do you connect a bidet sprayer to a tap?
On a toilet, you connect it to the cistern's water supply, using a 3-way tap or a tee adapter: one outlet feeds the cistern, the other the sprayer hose. Models with a mixer connect to hot and cold water, like a basin tap.
Can you fit a toilet bidet sprayer without a 3-way tap?
Yes, with a tee adapter screwed onto the outlet of the existing isolation valve. The 3-way tap, on the other hand, replaces the isolation valve. A model with two controls, like our bidet sprayer with two-way tee, lets you shut off the sprayer without shutting off the cistern.
Do you need a plumber to fit a toilet bidet sprayer?
Not on a floor-standing toilet whose isolation valve is accessible: the installation is done with a spanner, without touching the plumbing upstream. A plumber becomes useful if the isolation valve is stuck, so scaled up it will not unscrew, or hidden in a closed frame.
How much does it cost to fit a toilet bidet sprayer?
If you fit it yourself, the cost is limited to the materials: in our shop, a 3-way toilet tap starts at €14.90 and a kit with tee and holder at €29.90. A plumber's rate depends on the region and access to the isolation valve; ask for a quote.
How do you use the sprayer once it is fitted?
Always start with a low flow and aim the jet at an angle. Position, adjustment and drying are explained in our guide on washing with a toilet bidet sprayer.
